สวัสดีครับ สำหรับบทความในวันที่ ผู้เขียนจะขอแนะนำเทคนิคการ Preview รูปภาพตัวอย่าง ก่อนการ Upload ด้วย
Javascript บันทึกไฟล์ภาพไว้ใน Folder และ Path ของไฟล์เก็บไว้ใน DataBase MySQL
มาเริ่มกันเลย
1.กำหนด Style ของ Css กันก่อน เป็นการกำหนดให้แสดงผลปุ่มอยู่ตรงกลางหน้าจอ
  <style>
		body {
		  margin:0px;
		  height:100vh;
		}

		#center-image {
		  height:100%;
		  display:flex;
		  align-items:center;
		  justify-content:center;
		}

		.fimage {
		  width:350px;
		  padding:20px;
		}

		#preview{
		  width:100%;
		  display:none;
		  margin-bottom:30px;
		}

		#file1 {
		  display:none;
		}

		.fimage label {
		  display:block;
		  padding:5px;
		  text-align:center;
		  background:green;
		  color:#fff;
		  text-transform:Uppercase;
		  font-weight:800;
		  cursor:pointer;
		}

  </style>
2.เพิ่ม input สำหรับ upload ไฟล์ ดังนี้ โดยใน input จะมีการเรียกใช้ฟังชั่น preview(event); เพื่อแสดงผลรูปภาพ
	<div id="center-image">
	  <div class="fimage">
			<img id="preview">
			<label for="file1">Upload Image File</label>
			<input type="file" id="file1" name="file" accept="image/*" onchange="preview(event);">
	  </div>
	</div>
3.เพิ่ม คำสั่ง javascript ดังนี้ ในส่วนนี้เป็นการแสดงข้อมูลรูปภาพตัวอย่าง และ บันทึกไฟล์ไปที่ upload.php
	<script>

		function preview(event) {

		  let file = event.target;

		  let reader = new FileReader();

		  reader.onload = function() {
				var src = reader.result;
				var pre = document.getElementById("preview");
				pre.src = src;
				pre.style.display = "block";

				uploadFile(file);// call function upload file
		  };

		  reader.onerror = function() {
			console.log(reader.error);
		  };

		  reader.readAsDataURL(file.files[0]);
		}


		function uploadFile(file){

		  let xhr = new XMLHttpRequest(); //creating new xhr object (AJAX)

		  xhr.open("POST", "php/upload.php"); //sending post request to the specified URL

		  let data = new FormData(); //FormData is an object to easily send form data

		  data.append('file', file.files[0], file.files[0].name);

		  xhr.send(data); //sending form data

		}
	</script>
4.สร้าง Folder php และ สร้างไฟล์ upload.php
โดยในไฟล์นี้จะเป็นการ upload file ไปไว้ใน Folder files จากนั้นจะนำ imgPath ไป Save ใน Database
<?php

  $file_name =  $_FILES['file']['name']; //file name

  $tmp_name = $_FILES['file']['tmp_name']; //temp_name of file

  $file_up_name = time().$file_name; //making file name

  $imgPath =  "files/".$file_up_name;

  move_uploaded_file($tmp_name,$imgPath); //moving file to the specified folder

	//save image path to database
	$servername = "localhost";
	$username = "root";
	$password = "";
	$dbname = "test";

	// Create connection
	$conn = mysqli_connect($servername, $username, $password, $dbname);
	// Check connection
	if (!$conn) {
	  die("Connection failed: " . mysqli_connect_error());
	}

	$today = date("Y-m-d H:i:s");

	$sql = "INSERT INTO `image`(`id`, `image_path`, `create_date`) VALUES (NULL,'$imgPath','$today')";

	if (mysqli_query($conn, $sql)) {
	  echo "New record created successfully";
	} else {
	  echo "Error: " . $sql . "<br>" . mysqli_error($conn);
	}

	mysqli_close($conn);
?>
ผลการทำงาน
– เมื่อคลิกที่ปุ่ม UPLOAD IMAGE FILE และ เลือกไฟล์ จะมีการแสดงภาพตัวอย่างดังภาพ
จากนั้นจะมีการบันทึก path ของไฟล์ภาพลงใน database ครับ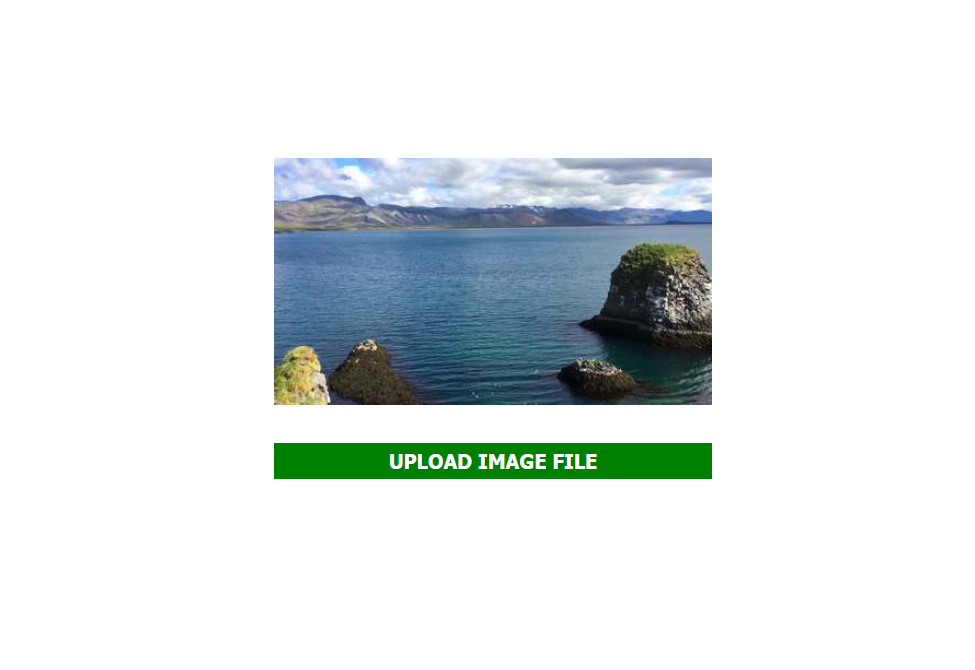 ตัวอย่าง code ทั้งหมดแบบเต็ม ๆ
<!DOCTYPE html>
<html>
<head>
  <style>
		body {
		  margin:0px;
		  height:100vh;
		}

		#center-image {
		  height:100%;
		  display:flex;
		  align-items:center;
		  justify-content:center;
		}

		.fimage {
		  width:350px;
		  padding:20px;
		}

		#preview{
		  width:100%;
		  display:none;
		  margin-bottom:30px;
		}

		#file1 {
		  display:none;
		}

		.fimage label {
		  display:block;
		  padding:5px;
		  text-align:center;
		  background:green;
		  color:#fff;
		  text-transform:Uppercase;
		  font-weight:800;
		  cursor:pointer;
		}

  </style>
</head>
<body>

	<div id="center-image">
	  <div class="fimage">
			<img id="preview">
			<label for="file1">Upload Image File</label>
			<input type="file" id="file1" name="file" accept="image/*" onchange="preview(event);">
	  </div>
	</div>

	<script>

		function preview(event) {

		  let file = event.target;

		  let reader = new FileReader();

		  reader.onload = function() {
				var src = reader.result;
				var pre = document.getElementById("preview");
				pre.src = src;
				pre.style.display = "block";

				uploadFile(file);// call function upload file
		  };

		  reader.onerror = function() {
			console.log(reader.error);
		  };

		  reader.readAsDataURL(file.files[0]);
		}


		function uploadFile(file){

		  let xhr = new XMLHttpRequest(); //creating new xhr object (AJAX)

		  xhr.open("POST", "php/upload.php"); //sending post request to the specified URL

		  let data = new FormData(); //FormData is an object to easily send form data

		  data.append('file', file.files[0], file.files[0].name);

		  xhr.send(data); //sending form data

		}
	</script>
</body>
</html>
<?php

  $file_name =  $_FILES['file']['name']; //file name

  $tmp_name = $_FILES['file']['tmp_name']; //temp_name of file

  $file_up_name = time().$file_name; //making file name

  $imgPath =  "files/".$file_up_name;

  move_uploaded_file($tmp_name,$imgPath); //moving file to the specified folder

	//save image path to database
	$servername = "localhost";
	$username = "root";
	$password = "";
	$dbname = "test";

	// Create connection
	$conn = mysqli_connect($servername, $username, $password, $dbname);
	// Check connection
	if (!$conn) {
	  die("Connection failed: " . mysqli_connect_error());
	}

	$today = date("Y-m-d H:i:s");

	$sql = "INSERT INTO `image`(`id`, `image_path`, `create_date`) VALUES (NULL,'$imgPath','$today')";

	if (mysqli_query($conn, $sql)) {
	  echo "New record created successfully";
	} else {
	  echo "Error: " . $sql . "<br>" . mysqli_error($conn);
	}

	mysqli_close($conn);
?>
CREATE TABLE `image` (
 `id` int(11) NOT NULL AUTO_INCREMENT,
 `image_path` varchar(255) CHARACTER SET utf8 NOT NULL,
 `create_date` datetime NOT NULL,
 PRIMARY KEY (`id`)
) ENGINE=InnoDB AUTO_INCREMENT=3  DEFAULT CHARSET=utf8
ขอบคุณที่เข้าชม หวังว่าจะเป็นประโยชน์ต่อผู้อ่านทุกท่านนะครับ