สวัสดีครับ ในบทความนี้จะเป็นบทความแรกที่เขียนเกี่ยวกับ ReactJs และ Firebase ครับ เนื่องจากบทความที่ผ่าน ๆ มาจะเกี่ยวกับการใช้งาน JQuery หรือ PHP เป็นส่วนใหญ่ครับ
ในบทความนี้จะเป็นการแนะนำตัวอย่างการใช้งานเบื้องต้น จะไม่ได้อธิบายถึง คำสั่ง หรือ หลักการทำงานต่าง ๆ ของคำสั่ง เช่น state , props หรือ component ต่าง ๆ (เพราะผมก็ไม่รู้เหมือนกันครับ 555) สามารถหาดูเพิ่มเติมใด้จากเว็บอื่น ๆ เนื่องจากมีท่านอื่น ๆ อธิบายใว้ดีมากแล้วครับ
1.ติดตั้ง Node Js
ไปที่ https://nodejs.org/en/ โหลดตัวที่เป็น LTS ก็ได้ครับ จากนั้นติดตั้งให้เรียบร้อยครับ

2.เมื่อติดตั้ง Node Js เรียบร้อยแล้ว
เปิด Command Prompt แล้วพิมพ์ คำสั่ง npm install -g create-react-app เพื่อติดตั้ง React
npm install -g create-react-app

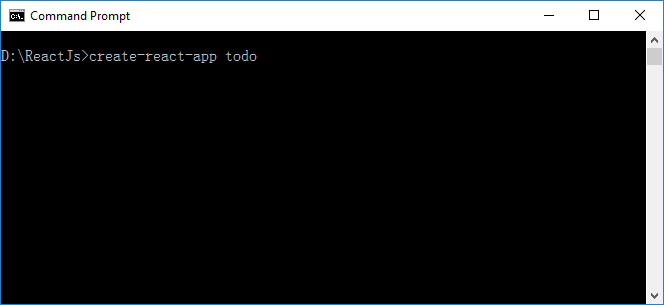
เมื่อติดตั้งเรียบร้อยจากนั้นพิมพ์คำสั่ง create-react-app todo
create-react-app todo
รอสักครู่ กำลังติดตั้ง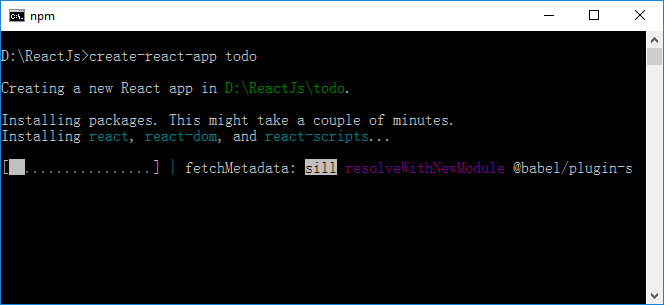
เมื่อติดตั้งเรียบร้อย
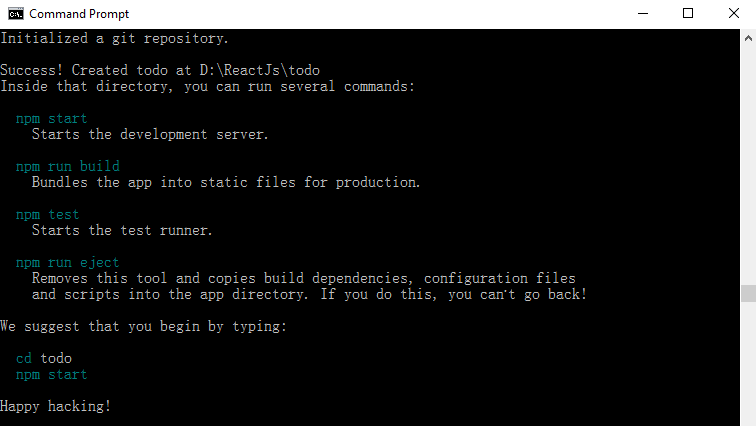
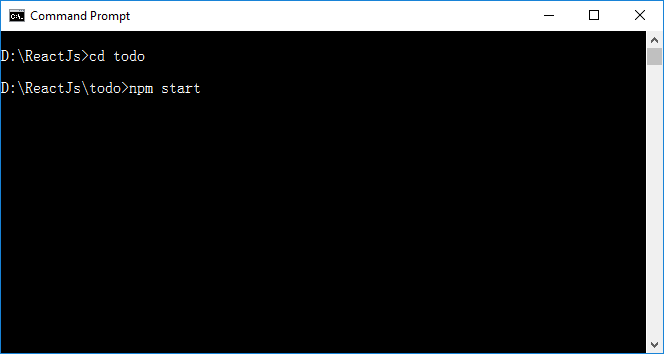
จากนั้นพิมพ์คำสั่ง cd todo เพื่อเปลี่ยน Directory ไปยัง Folder todo ที่เราติดตั้ง React เอาไว้
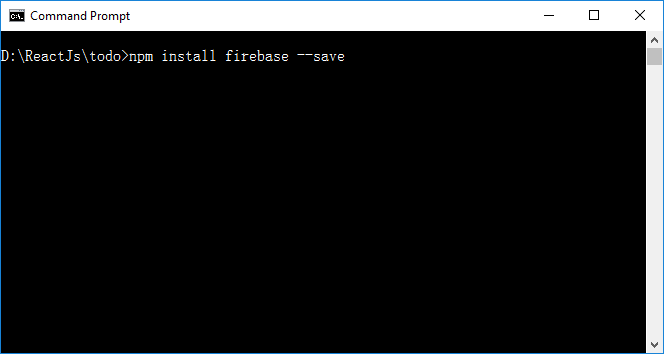
พิิมพ์คำสั่ง npm install firebase –save เพื่อติดตั้ง Firebase
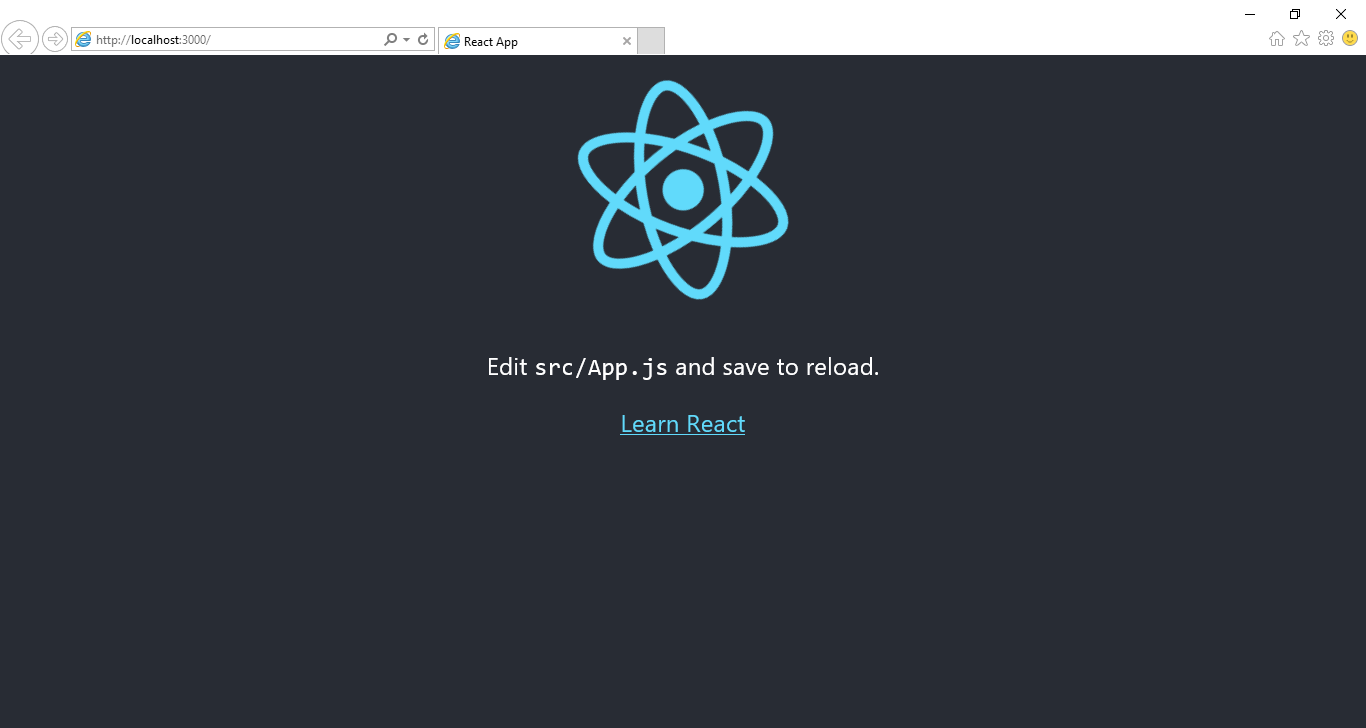
เมื่อติดตั้ง firebase เรียบร้อยแล้ว พิมพ์คำสั่ง npm start เพื่อ เริ่มต้นการทำงานของ React JS
หากไม่มีอะไรผิดพลาด React จะเปิด หน้าเว็บ http://localhost:3000/ ขึ้นมาอัตโนมัติครับ ถือว่าเสร็จสิ้น
ขั้นตอนการ Install ReactJs ครับ
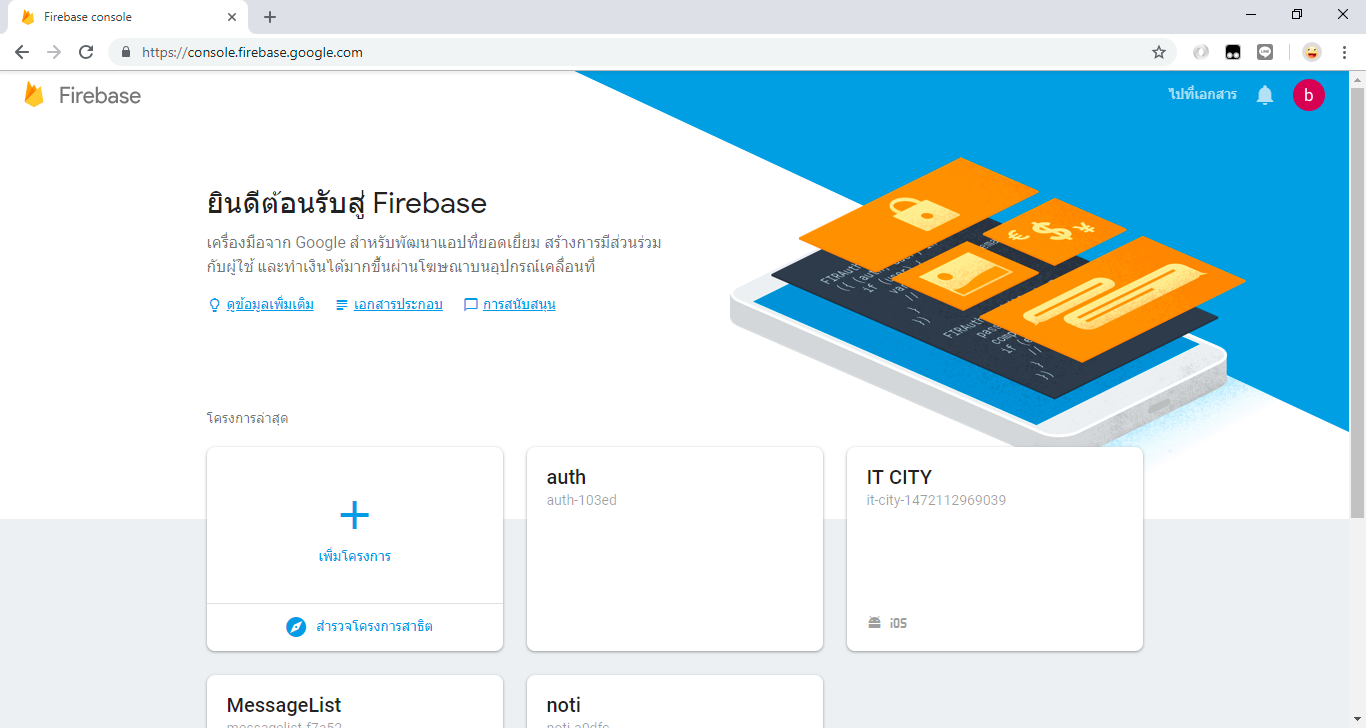
3.Firebase Realtime Database
ไปที่ https://console.firebase.google.com ต้อง Login ด้วย Gmail ก่อนนะครับ
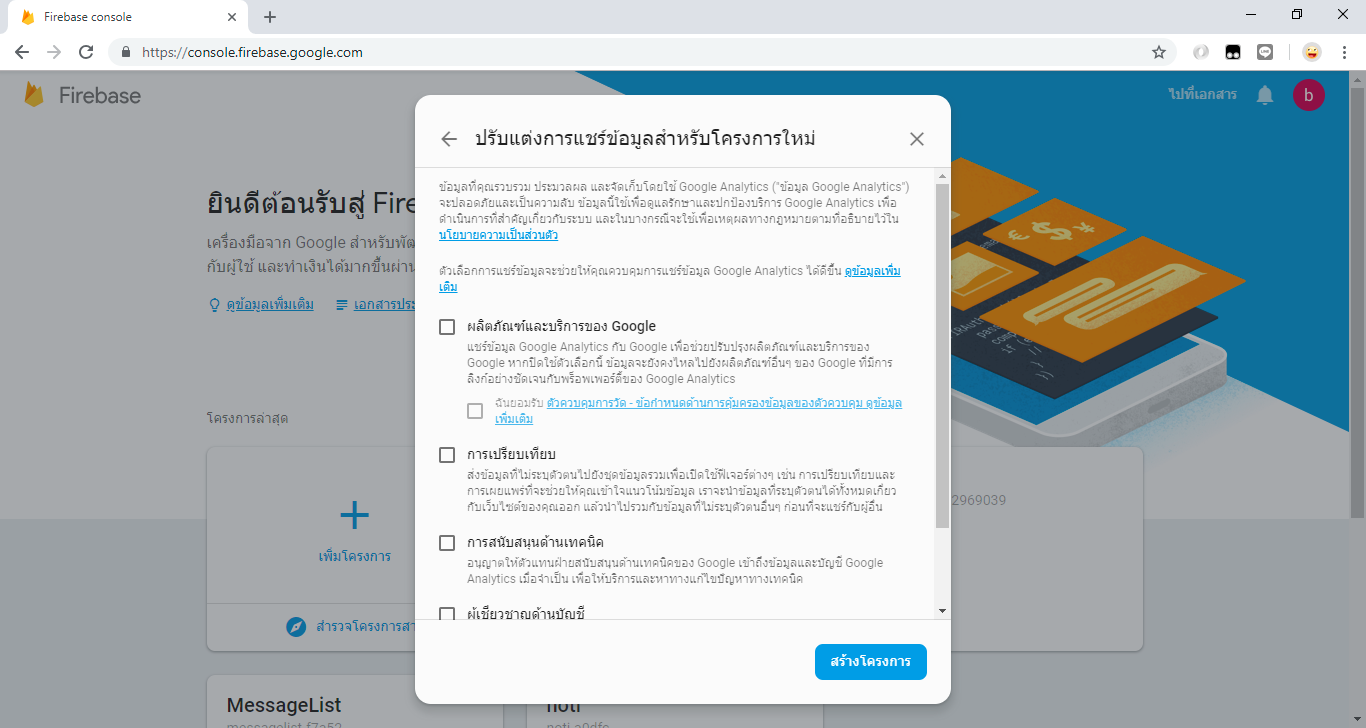
3.1 การเพิ่มโครงการ
คลิกที่เพิมโครงการ
ระบุชื่อโครงการ ตัวอย่างใช้ขื่อว่า todo
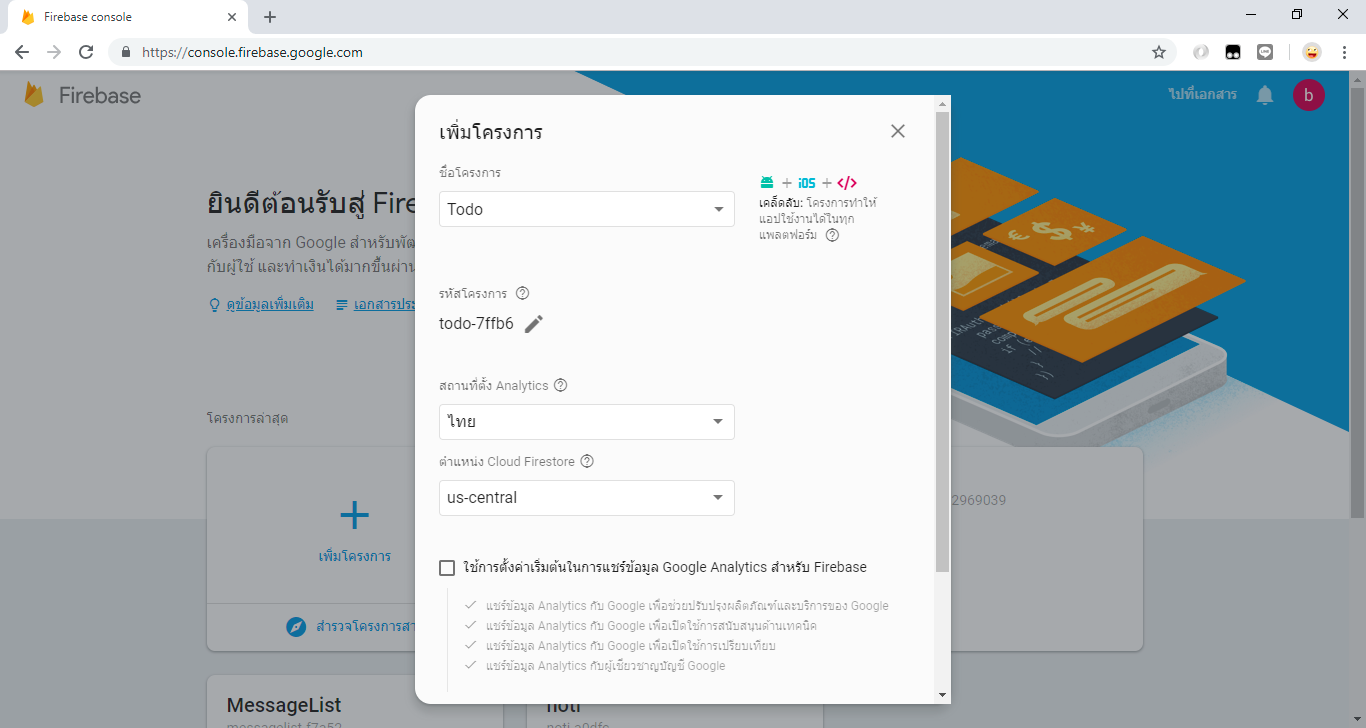
คลิกปุ่มสร้างโครงการ
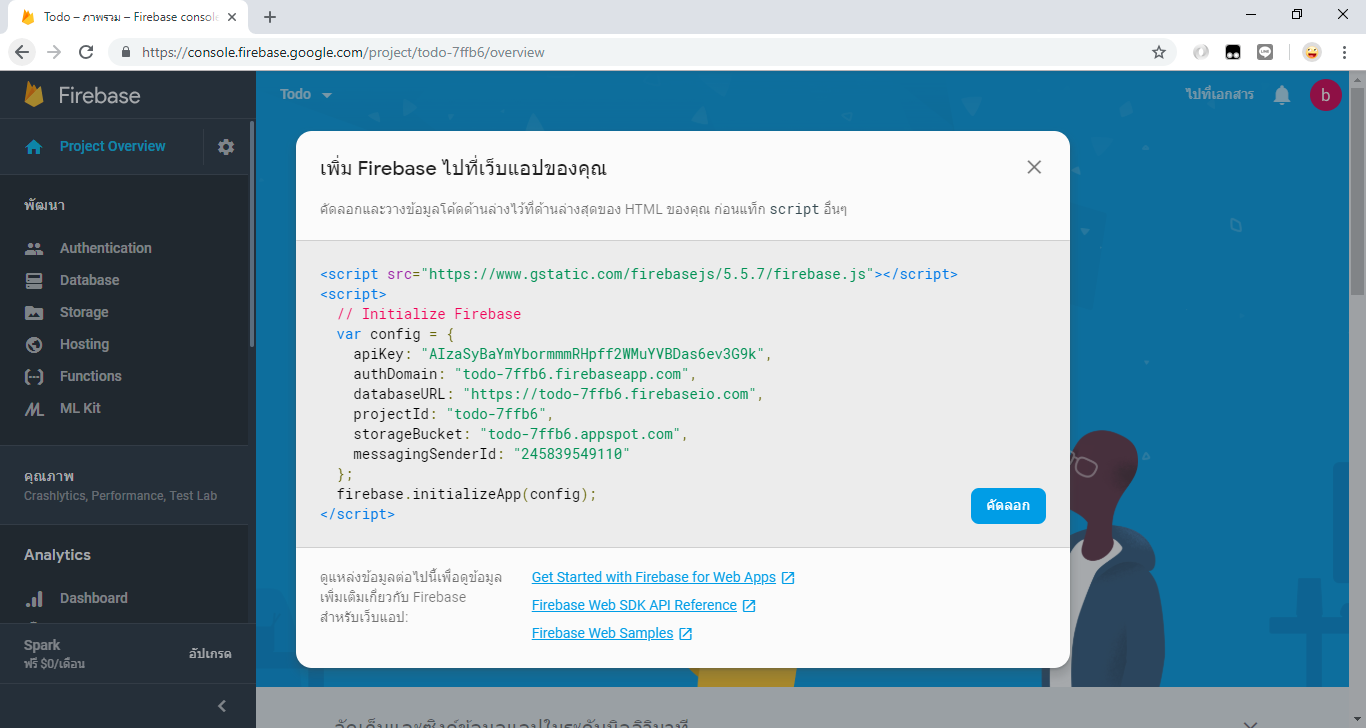
3.2 คัดลอกค่า Config ของ Firebase เพื่อเชื่อมต่อกับ React Js
เมื่อสร้างโครงการ todo เรียบร้อยแล้ว ให้คลิกที่ ปุ่ม </>

ให้ทำการ คัดลอกค่า ที่อยู่ในตัวแปร var config ของ firebase เก็บไว้ก่อนครับ (เราจะนำค่านี้ไปใส่ใน React อีกครั้งครับ)
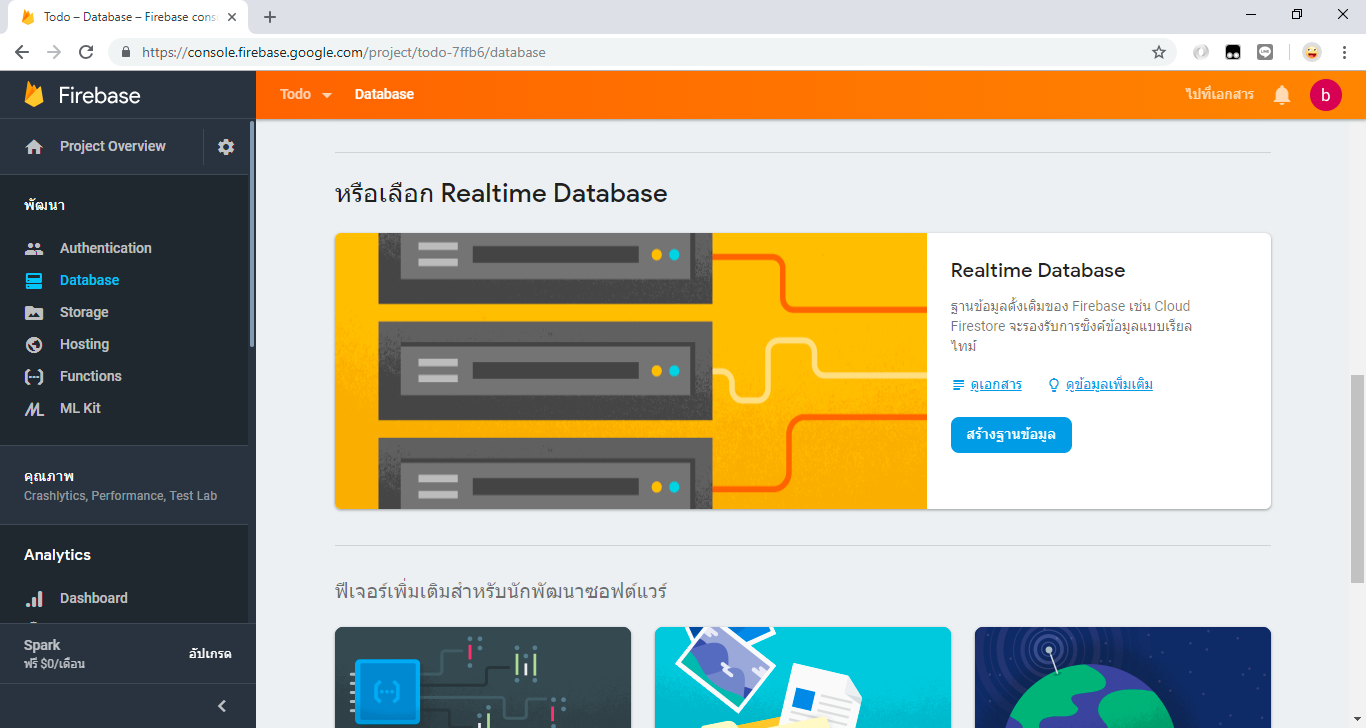
3.3 การสร้างฐานข้อมูล Realtime Database
คลิกที่เมนู database ด้านซ้ายมือ
จากนั้น เลือนหา คำว่า Realtime database คลิกปุ่ม สร้างฐานข้อมูล
เลือก เริ่มต้นในโหมดทดสอบ
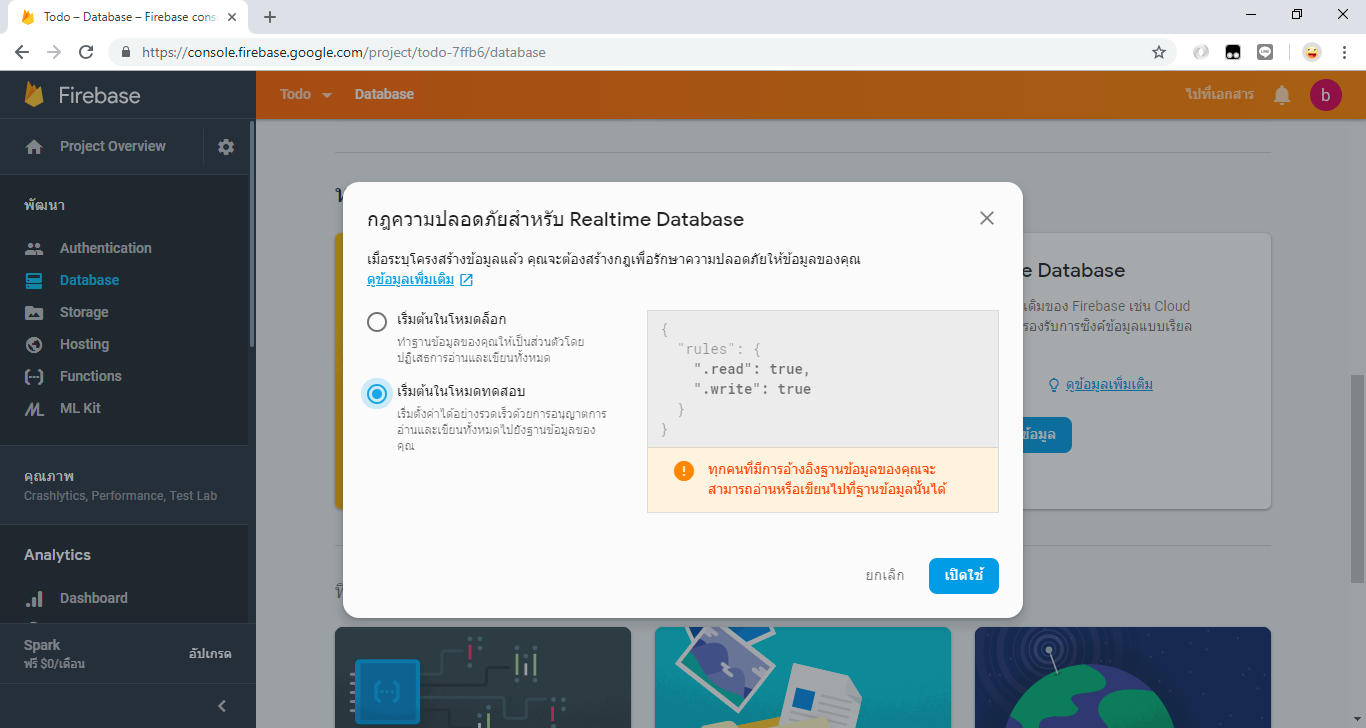
หากเรียบร้อยแล้ว firebase จะแสดง หน้า ฐานข้อมูล Realtime database ดังภาพ

เขียน Code ด้วย Visual Studio Code
หากใครยังไม่มี สามารถไป Download ได้ที่ https://code.visualstudio.com/
สร้างไฟล์ firebase.js ไว้ที่ Folder todo/src/firebase.js แล้วให้นำค่า config ของ firebase ที่คัดลอกไว้จาก ข้อ 3.2 ด้านบน มาใส่แทนค่าตัวอย่างครับ
import * as firebase from 'firebase';

//insert config from firebase
const config = {
    apiKey: "AIzaSyALLdhasdfs6Yh4FHxMQTkKCq1R-EgPA",
    authDomain: "auth-103ssed.firebaseapp.com",
    databaseURL: "https://audth-1f03ed.firebaseio.com",
    projectId: "auth-10df3ed",
    storageBucket: "autdfh-103ed.appspot.com",
    messagingSenderId: "563454061114013"
};
firebase.initializeApp(config);

export default firebase;
ต่อมาเราจะใช้ Bootstrap 4 มาช่วยในการแสดงผลให้สวยงามมากยิ่งขึ้น
ไปที่ Folder todo/public/index.html
จากนั้นเพิ่ม Script bootstrap 4 ตัวอย่าง Code หน้า index.html
    <link rel="manifest" href="%PUBLIC_URL%/manifest.json">

    <!--Add  Bootstrap4 Script -->
    <link rel="stylesheet" href="http://getbootstrap.com/docs/4.1/dist/css/bootstrap.min.css">
จากนั้นเราจะทำการแก้ไขไฟล์ todo/src/app.js
import React, { Component } from 'react';

class App extends Component {

  constructor(){
     super();
     this.state = {
        items:[],
        item_id:'',
        title:'',
        description:''
     }

     this.handleChange = this.handleChange.bind(this)
     this.handleSubmit = this.handleSubmit.bind(this)
  }

  handleChange(e){
     this.setState({
       [e.target.name]:e.target.value
     })
  }

  handleSubmit(e){
     e.preventDefault();
  }

  render() {
    return (
      <div className="app">
          <nav class="navbar navbar-light bg-primary">
            <span class="navbar-brand mb-0 h1">Todo List</span>
          </nav>
          <div className="container" style={{marginTop:70}}>
          <form  onSubmit={this.handleSubmit}>
            <div className="row">
                <div className="col-8">
                  <div className="form-row">
                    <div className="col-4">
                      <input type="text" name="title" className="form-control" placeholder="Title" onChange={this.handleChange} value={this.state.title}/>
                    </div>
                    <div className="col-6">
                      <input type="text" name="description" className="form-control" placeholder="Description" onChange={this.handleChange} value={this.state.description}/>
                    </div>
                    <div className="col">
                          <button class="btn btn-primary" ><i className="fa fa-save"></i> Save</button>
                    </div>
                  </div>
                </div>
            </div>
          </form>
        <hr/>
              <table className="table table-sm table-bordered">
                    <tr className="thead-dark">
                      <th width="20%">Title</th>
                      <th width="70%">Description</th>
                      <th width="5%">Edit</th>
                      <th width="5%">Delete</th>
                    </tr>
                </table>
          </div>
      </div>
    );
  }
}

export default App;
ตัวอย่างการแสดงผล ตอนนี้เราก็ได้สร้างหน้า Ui สำหรับแสดงผลเรียบร้อยแล้ว แต่ยังทำอะไรไม่ได้ต้องมาเขียน ส่วนของการเชื่อมต่อ Firebase กันต่อครับ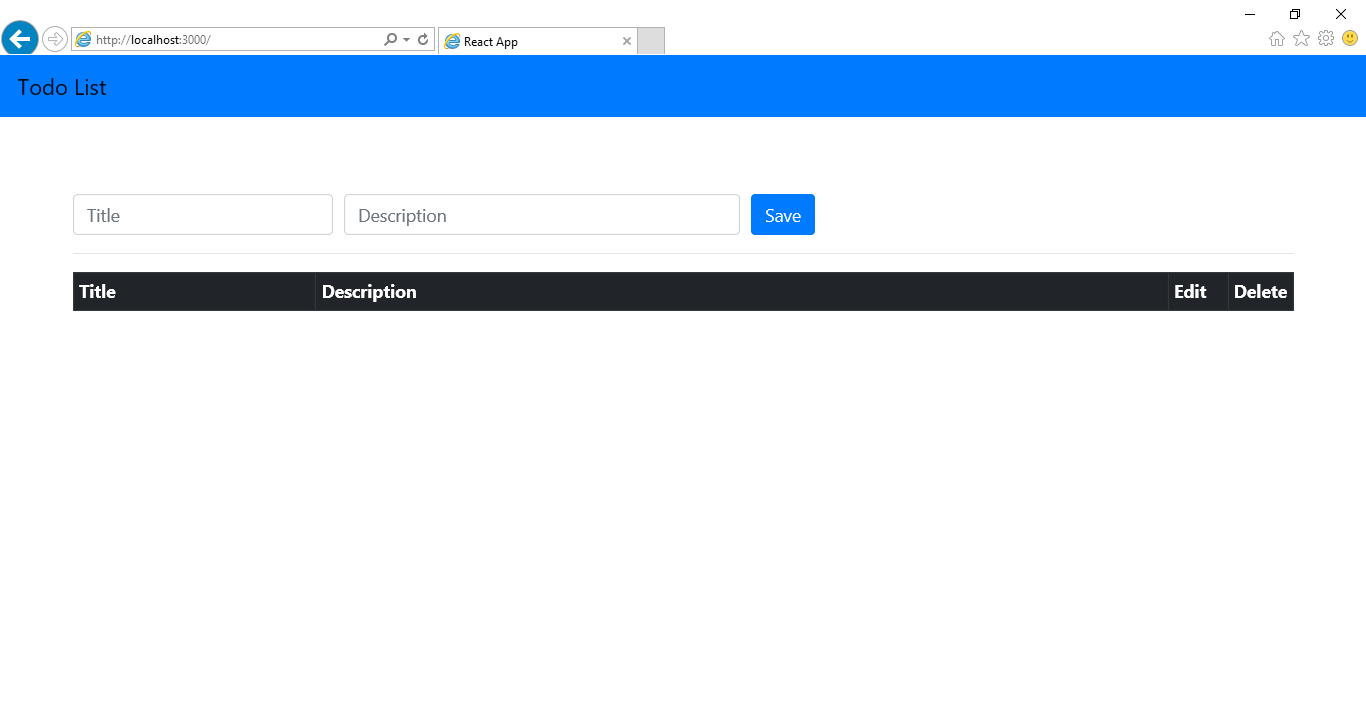
มาปรับแก้ไฟล์ App.js กันต่อแต่คราวนี้เราจะมาเพิ่มส่วนของการเชื่อมต่อกับ Firebase กัน
เพิ่ม การ import firebase
import React, { Component } from 'react';

import firebase from './firebase'

class App extends Component {

//...
เพิ่ม function componentDidMount
class App extends Component {
  constructor(){
      //......
  }

  componentDidMount(){
     const itemsRef = firebase.database().ref('items');
     itemsRef.on('value',(snapshot) => {
        let items = snapshot.val();
        let newState = [];
        for(let item in items){
           newState.push({
              item_id:item,
              title:items[item].title,
              description:items[item].description
           })
        }
        this.setState({
           items:newState
        })
     })
  }
แก้ไข function handleSubmit
  handleSubmit(e){
     e.preventDefault();

     if(this.state.item_id !== ''){
          return this.updateItem()
     }

     const itemsRef = firebase.database().ref('items')
     const item = {
        title : this.state.title,
        description : this.state.description
     }
     itemsRef.push(item)
     this.setState({
        item_id:'',
        title:'',
        description:''
     })
  }
แก้ไข function handleUpdate , itemUpdate และ removeItem
  handleUpdate = (item_id = null , title = null , description = null) => {
    this.setState({item_id,title,description})
  }

  updateItem(){

      var obj = { title:this.state.title,description:this.state.description }

      const itemsRef = firebase.database().ref('/items')

      itemsRef.child(this.state.item_id).update(obj);

      this.setState({
        item_id:'',
        title:'',
        description:''
      })

  }

  removeItem(itemId){
    const itemsRef = firebase.database().ref('/items');
    itemsRef.child(itemId).remove();
 }
หากไม่มีอะไรผิดพลาด จะสามารถ เพิ่ม แก้ไข และ ลบข้อมูลได้
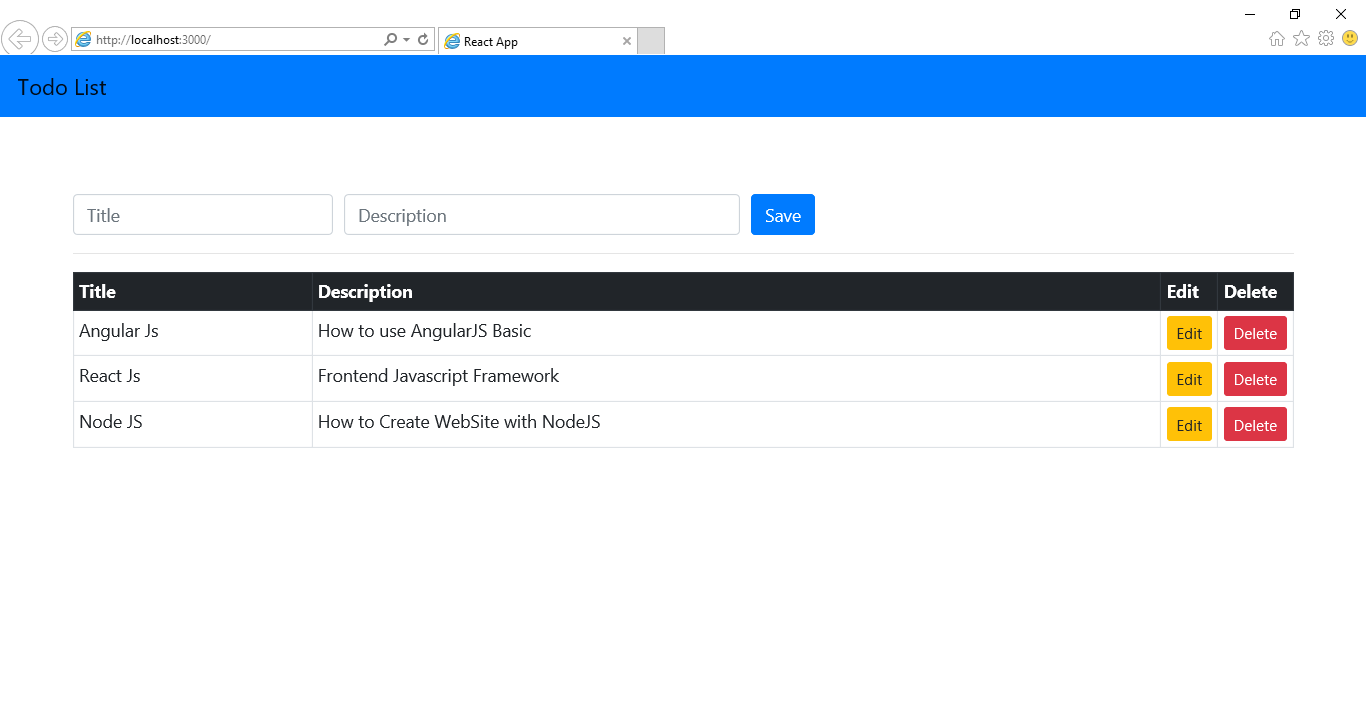 เมื่อมาดูที่ Firebase Console ก็จะเห็นว่ามีข้อมูลที่เราได้เพิ่มไว้เข้ามาแล้วครับ

ตัวอย่างไฟล์ App.js แบบเต็ม ๆ
import React, { Component } from 'react';

import firebase from './firebase'

class App extends Component {

  constructor(){
     super();
     this.state = {
        items:[],
        item_id:'',
        title:'',
        description:''
     }

     this.handleChange = this.handleChange.bind(this)
     this.handleUpdate = this.handleUpdate.bind(this)
     this.handleSubmit = this.handleSubmit.bind(this)

  }

  componentDidMount(){
    const itemsRef = firebase.database().ref('items');
    itemsRef.on('value',(snapshot) => {
        let items = snapshot.val();
        let newState = [];
        for(let item in items){
          newState.push({
              item_id:item,
              title:items[item].title,
              description:items[item].description
          })
        }
        this.setState({
          items:newState
        })
    })
  }

  handleChange(e){
    this.setState({
      [e.target.name]: e.target.value
    })
  }


  handleSubmit(e){
    e.preventDefault();

    if(this.state.item_id != ''){
      return this.updateItem();
    }

    const itemsRef = firebase.database().ref('items')
    const item = {
       title : this.state.title,
       description : this.state.description
    }
    itemsRef.push(item)
    this.setState({
       item_id:'',
       title:'',
       description:''
    })
 }


  handleUpdate = (item_id = null , title = null , description = null) => {
    this.setState({item_id,title,description})
  }

  updateItem(){

      var obj = { title:this.state.title,description:this.state.description }

      const itemsRef = firebase.database().ref('/items')

      itemsRef.child(this.state.item_id).update(obj);

      this.setState({
        item_id:'',
        title:'',
        description:''
      })

  }

  removeItem(itemId){
    const itemsRef = firebase.database().ref('/items');
    itemsRef.child(itemId).remove();
 }

  render() {
    return (
      <div className="app">
          <nav class="navbar navbar-light bg-primary">
            <span class="navbar-brand mb-0 h1">Todo List</span>
          </nav>
          <div className="container" style={{marginTop:70}}>
          <form  onSubmit={this.handleSubmit}>
            <div className="row">
                <div className="col-8">
                  <div className="form-row">
                    <div className="col-4">
                      <input type="text" name="title" className="form-control" placeholder="Title" onChange={this.handleChange} value={this.state.title}/>
                    </div>
                    <div className="col-6">
                      <input type="text" name="description" className="form-control" placeholder="Description" onChange={this.handleChange} value={this.state.description}/>
                    </div>
                    <div className="col">
                          <button class="btn btn-primary" > Save</button>
                    </div>
                  </div>
                </div>
            </div>
          </form>
        <hr/>
              <table className="table table-sm table-bordered">
                    <tr className="thead-dark">
                      <th width="20%">Title</th>
                      <th width="70%">Description</th>
                      <th width="5%">Edit</th>
                      <th width="5%">Delete</th>
                    </tr>
                    {
                        this.state.items.map((item) => {
                          return (
                              <tr>
                                <td>{item.title}</td>
                                <td>{item.description}</td>
                                <td><button className="btn btn-warning btn-sm" onClick={() => this.handleUpdate(item.item_id,item.title,item.description)}>Edit</button></td>
                                <td><button className="btn btn-danger btn-sm" onClick={() => this.removeItem(item.item_id)}>Delete</button></td>
                              </tr>
                          )
                        })
                    }
                </table>
          </div>
      </div>
    );
  }
}

export default App;